
A teacher's guide for using the online vocabulary picture games
Below I will explain how I think to best use our online vocabulary picture/photo games in your class and with whom I would recommend playing them with.
Before you read this guide, I would recommend playing one of the picture games (on a desktop or laptop computer) first. It will give you context and make reading this guide easier.
Purposes of the games
These games have been specifically designed for students learning English as a second language and to be used as a group activity in classroom environments. This is especially the case with the desktop/laptop version of the games (more about the difference between that and the mobile version later).
The principle purpose of the games is to reinforce vocabulary students have just been studying in class, already know or have learnt in the past.
Although students should know or have come across much of the vocabulary in each game, there will be some of it which they probably won't have. So a secondary purpose is to teach them new vocabulary on the topic of the game.
In both situations (on the desktop version), you can review the vocabulary at the end of the game with the class.
Student age and level for the games
You can use them with both children (from 9 years upwards) and adults. Some of the games are more specifically designed for adults (for example, the games on different types of household furniture and fixtures) as 10 or 11-year-old children may not know the names of some of the objects in the game yet in their own language (e.g. a headboard). But for the most part, the games can be played by both groups.
Regarding the level of English for the students, they can be used with students with a good A2 level of English up to a B2 level. Although you can use them with students who have a C1 level, I personally don't as they find them too easy in my experience.
Difference between desktop and mobile versions of the game
Something that it is important for you to know is that there is a difference between the desktop and mobile versions of the game. The main reason for this is because of the different screen sizes of the devices (you can obviously show more information on a desktop computer screen than you can on a mobile screen). Although the images and vocabulary are the same in both versions, how the game is played is different.
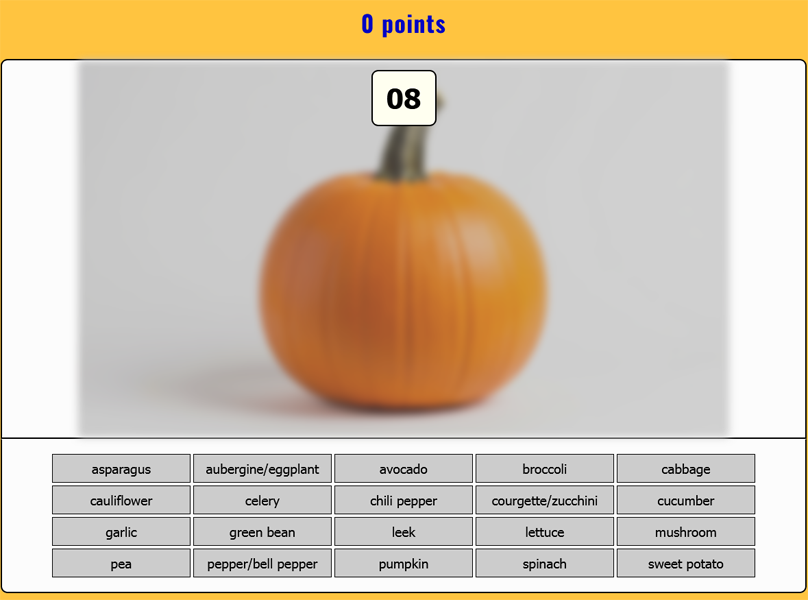
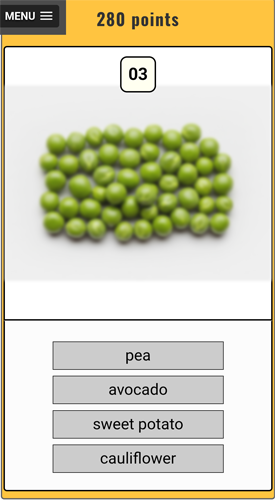
Rather than explain these differences to you, below you can see them for yourself in screenshots of the game taken firstly from the desktop/laptop version and secondly from the mobile version:
Desktop Version
Mobile Version
The desktop version has been designed to be played as a class/group activity in classrooms where both the teacher and students are involved, whereas the mobile version has been designed for more independent learning.
With my classes, I would only use the mobile version of the game with my students if I am getting the students to play the game for homework. In a classroom which has an interactive board or screen I would only ever use the desktop version of the game.
Doing the games in class
Below I will recommend how to play the online games in class with students. This is only a recommendation, so play the games with your students however you want.
First, review the vocabulary
After putting the game on the interactive board or screen in the class, I would always review the vocabulary with students as a class before playing the game. I would go around the class and get each student to read out one of the objects/actions they are going to see images of in the game.
If a student or students don't know what a word is, I would encourage the other students to say what it is or if they don't know, I would explain what it is to them (e.g. 'a washing line is where you hang clothes to dry after taking them out of a washing machine').
Playing the game
They play the game as a class, however I would not recommend getting all the students in class up to the board or screen to play it at the same time. Instead, for each round of the game I would call up a different student to come to the board or screen to play it. The other students can shout out suggestions, but only one student is at the board or screen at any one time. I would keep note of any of the objects/actions which the students struggled at identifying during the game.
After the game
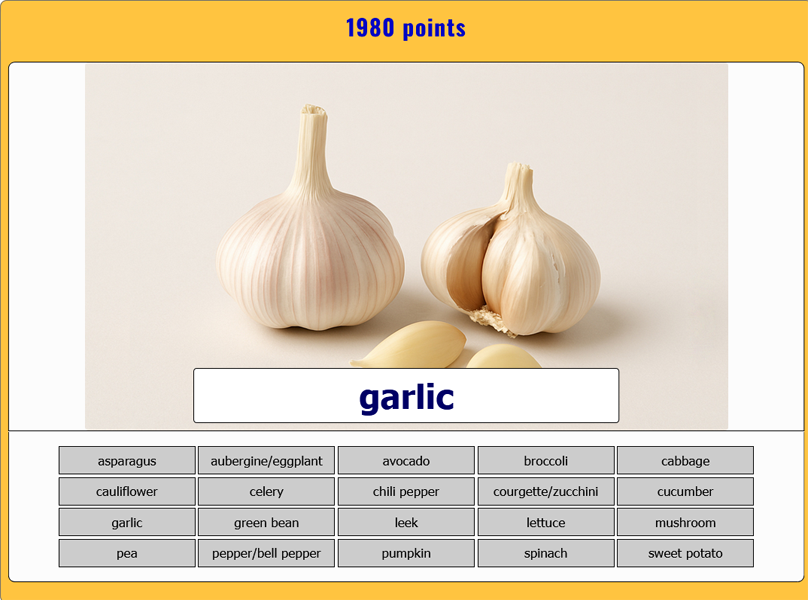
On the desktop version (but not on the mobile version) when the game is finished, you can review the vocabulary of any of the images with your students (especially those which you saw your students struggling on whilst playing). You can do this by simply clicking on the name of any object/action in the list and its image and name will be shown on the screen like below:
You can either get a student in the class to verbally make a sentence with the name of the object/action or get all the students in the class to each write their own sentence with the word in their notebook and then get some of them to read it out to the class.
I hope this guide helps you with using our online vocabulary picture games in your classes. If you have any questions on using them or suggestions for using or new games, feel free to contact me at contact@blairenglish.com
Enjoy!

Follow us on